Green Screens
Green-Screens can be used to change the background of a scene.
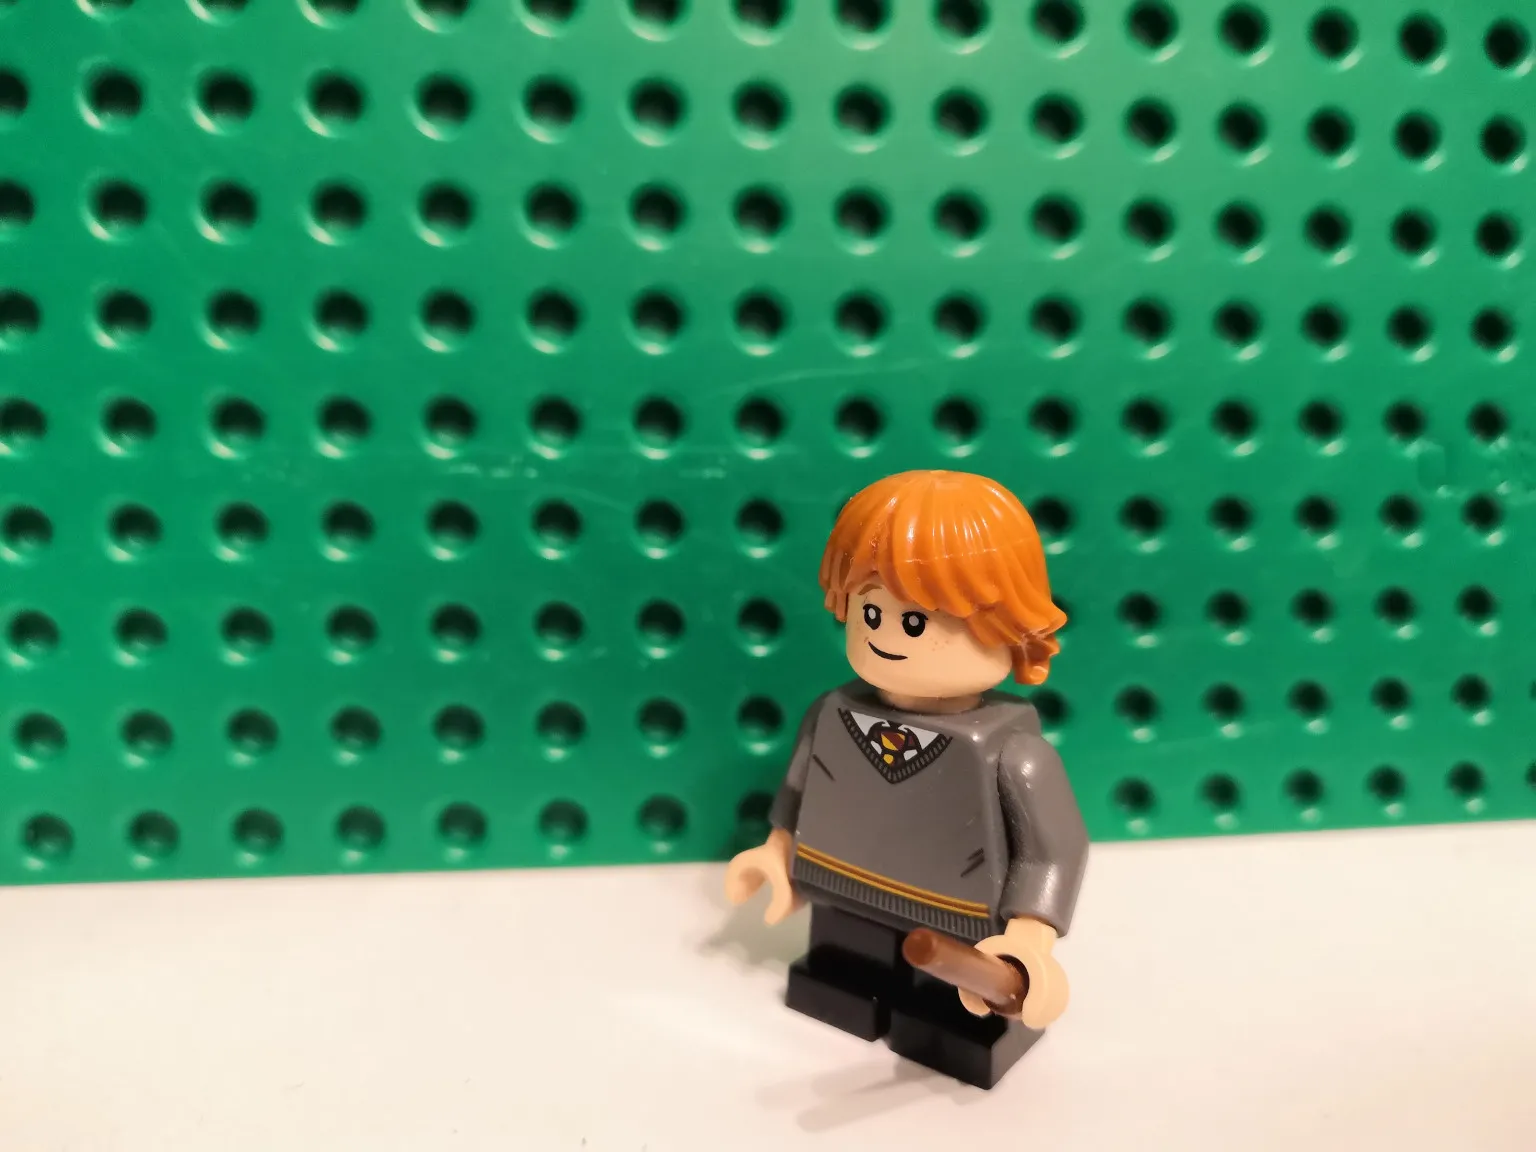
In our case, we are removing the green screen from our actor Ron. You can download the image for testing here.
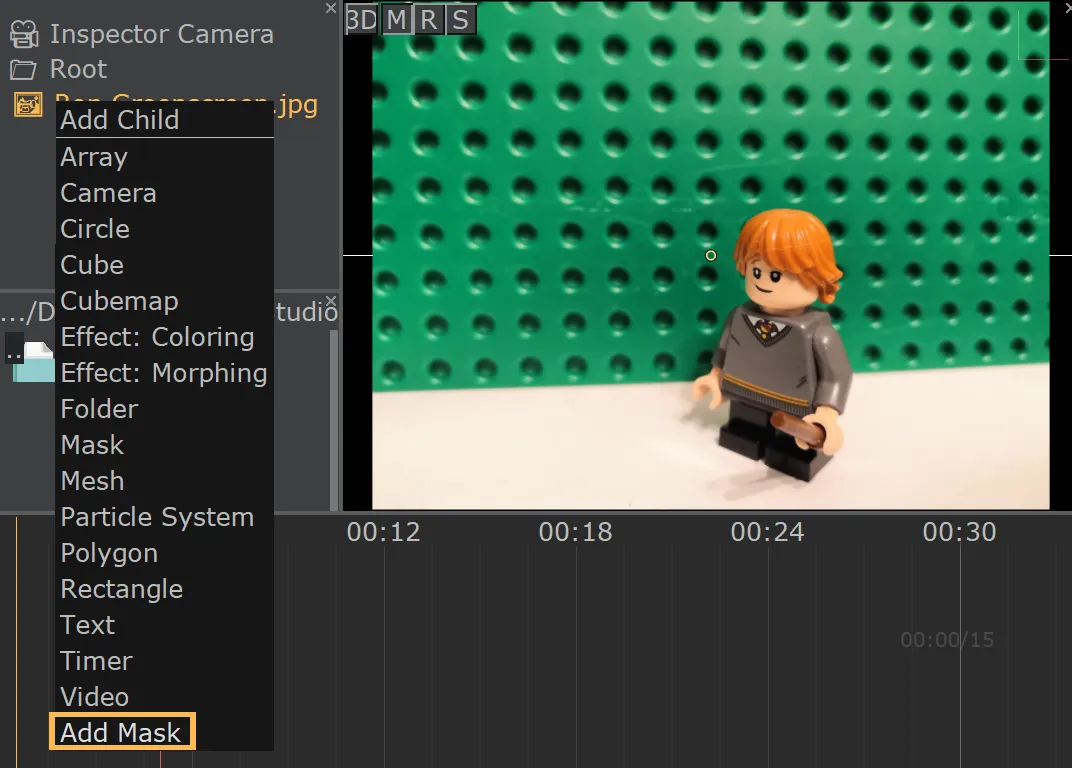
In Rem's Studio, you can right click on an element to add a mask component, but you could add it manually as well.
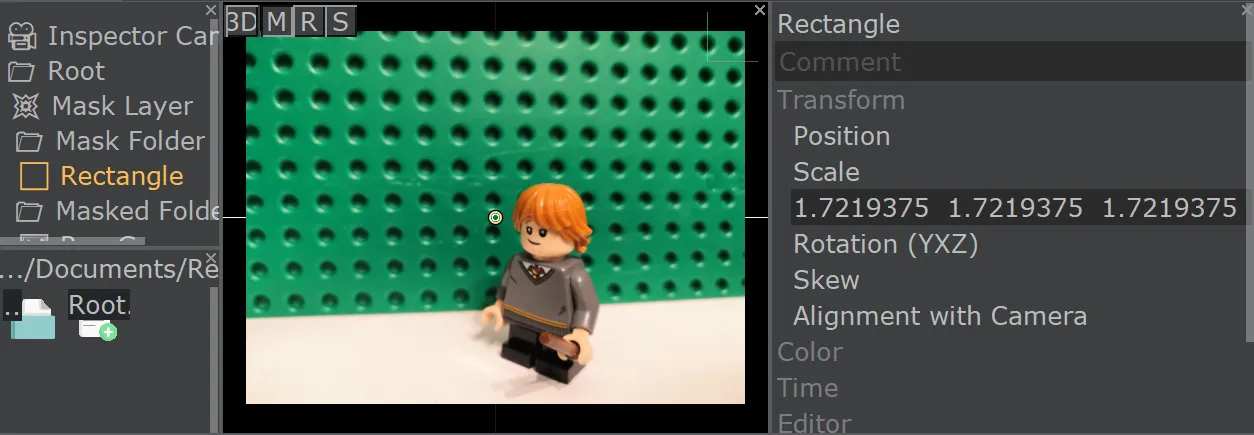
Scale the Rectangle component inside the Mask Folder so that it covers the whole image.
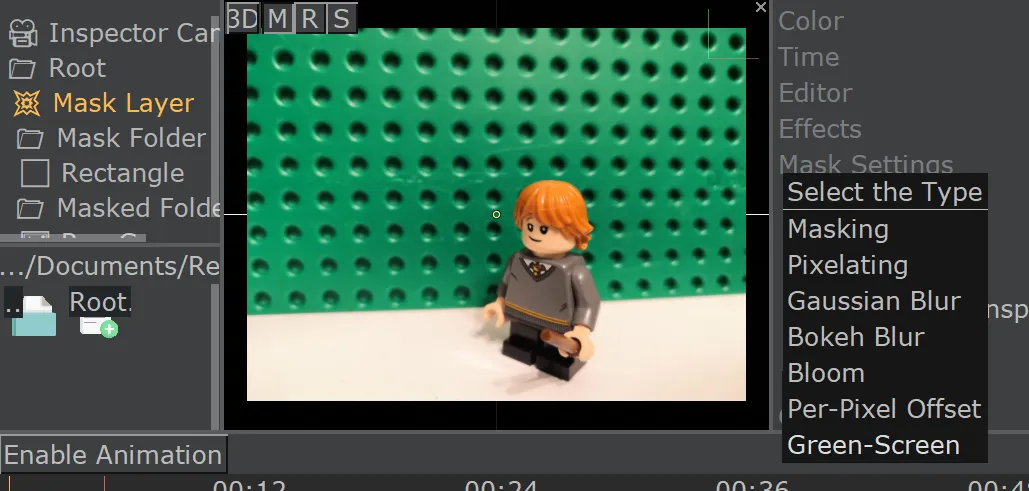
Then change the type of the Mask in Mask Settings in the property inspector to "Green-Screen".
You may already see, that a white portion of your image disappeared.
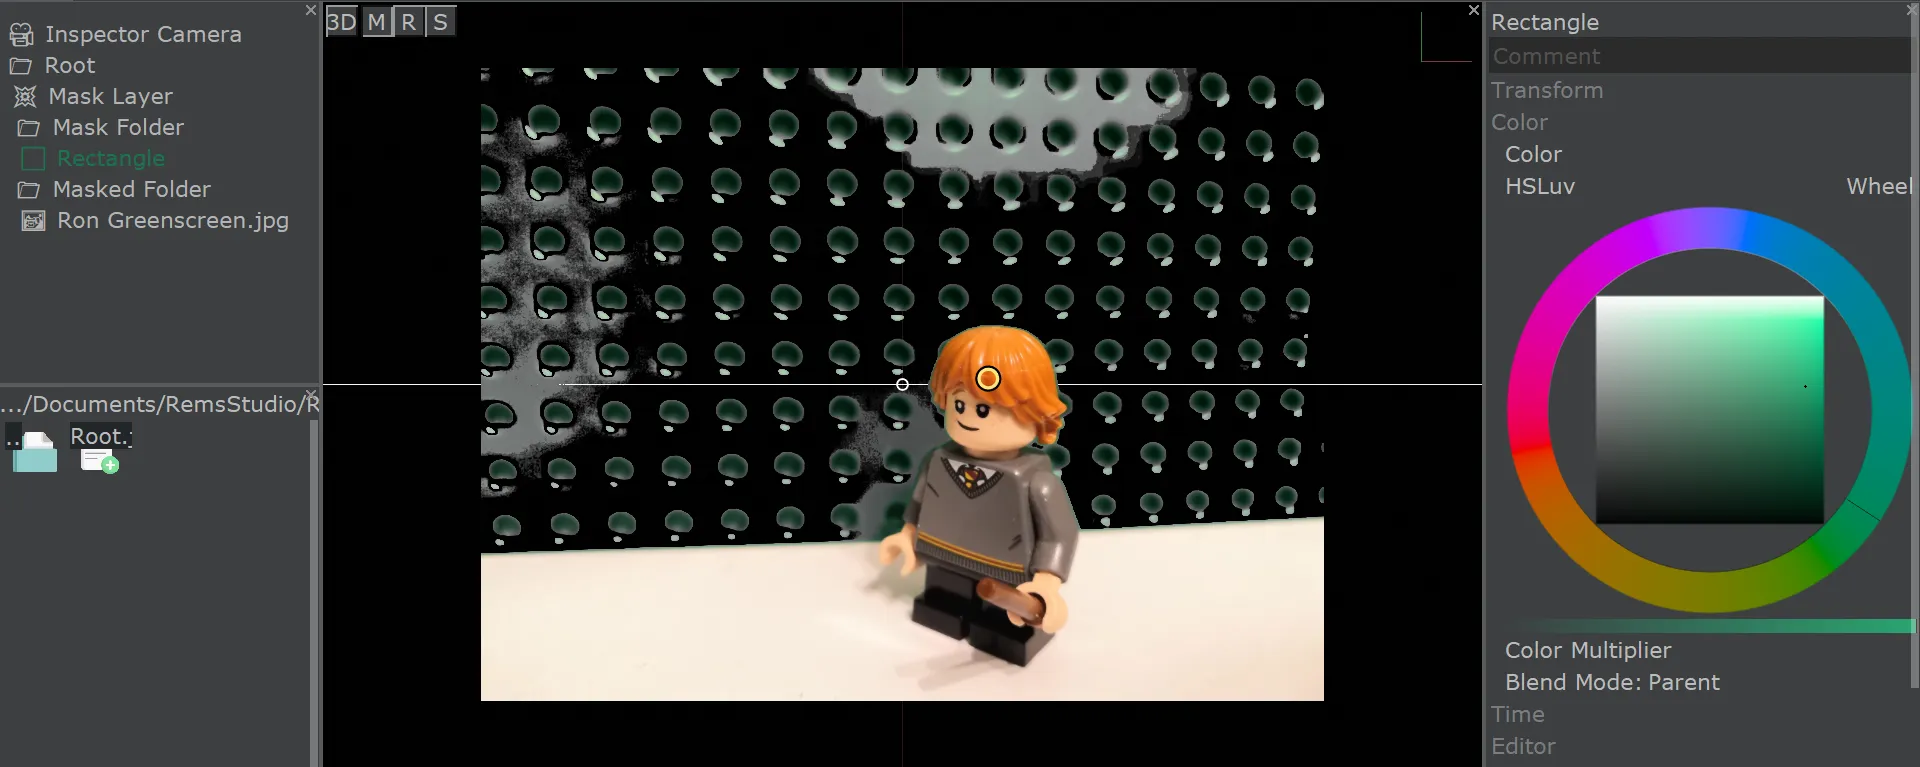
As the next step, select the Rectangle component and choose a color similar to your green-screen. The more green-screen disappears, the better. For our image of Ron, most is gone, but there still are some residuals.
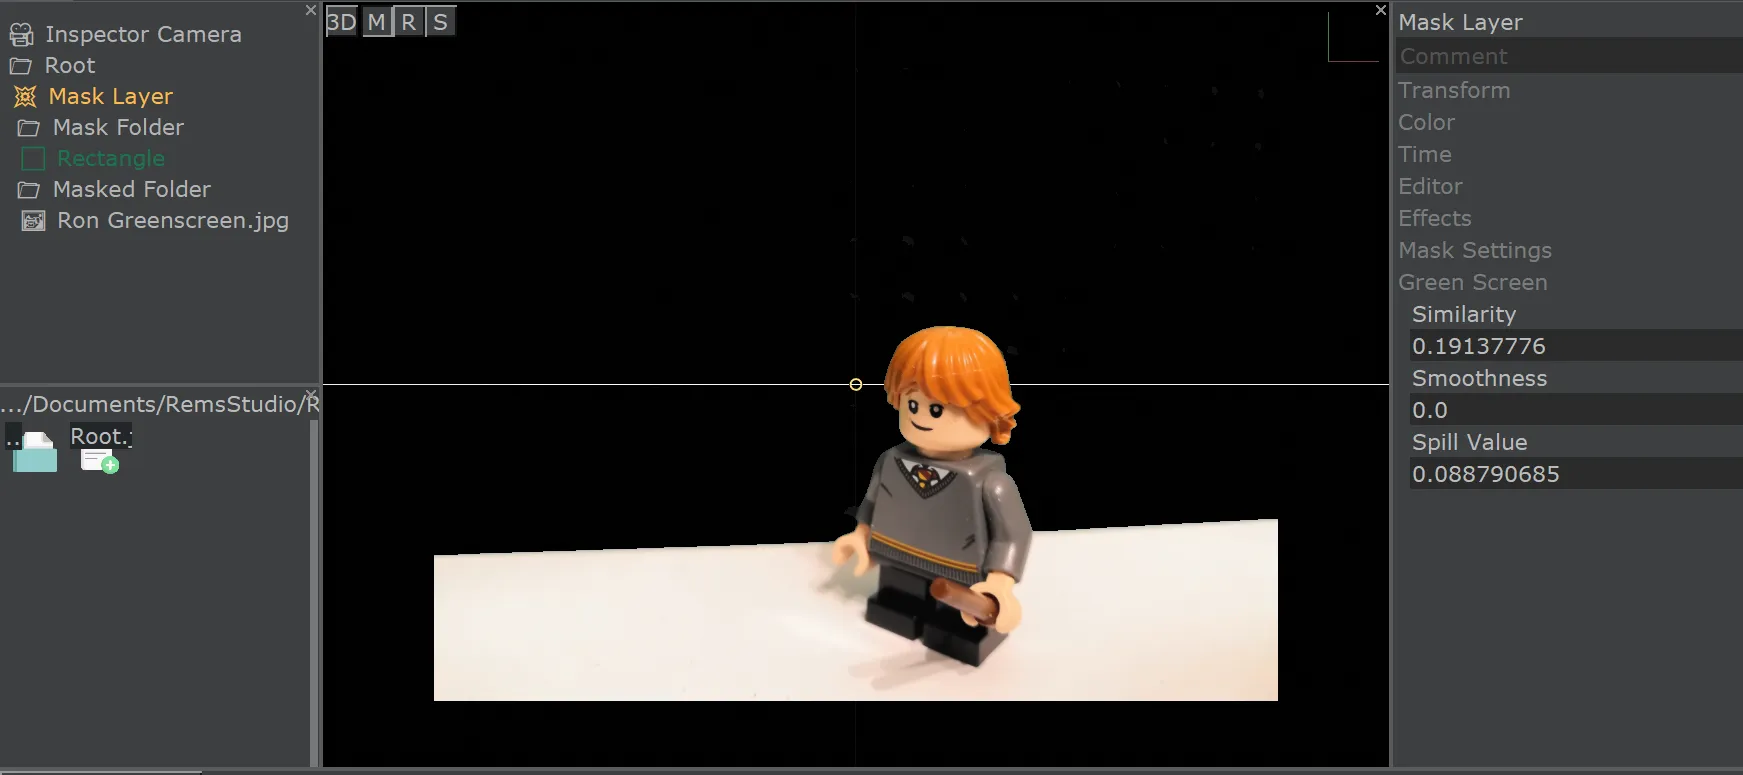
To get even better results, you always should tune the Green Screen settings in the Mask component. In this case, we had to increase the Similarity value a lot, because our green-screen has large brightness variations, while increasing smoothness and spill factor didn't matter that much or didn't bring any benefit.
If you need even better results, or have a static, but colorful background, you can try to extract the background in a program like Gimp and use it as a background instead of the single-colored plane, we used here (Rectangle component).
If your green-screen changes slightly over time of your video, you can animate the color of the Rectangle and all settings of the Mask component.
If you want to keep the background as a silhouette, check the Inverse Mask box in the Mask Settings of the Mask component.
Edit:
Check your results in front of a bright background!
With these settings, I missed a few black bits. The similarity had to be increased to a value of 0.20 .
Created: 10:45, 12. Dec 2020; Most recent change: 08:22, 15. Dec 2020